Monthly Archives: June 2011

Strawberry Cheesecake Cupcakes

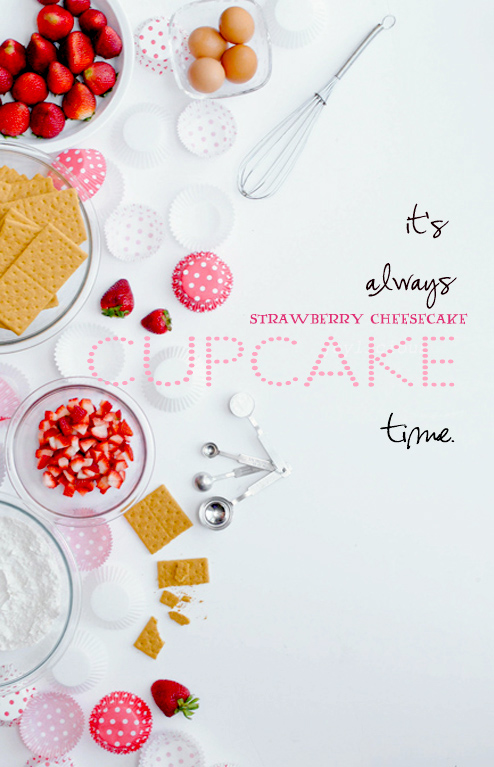
I always tell girlfriends who can’t cook — “Ladies, there’s only 3 recipes you’ll ever have to learn to win over any man’s heart: the perfectly seared steak, killer mashed potatoes and these Strawberry Cheesecake Cupcakes.”  I’m not much of a bragger or anything but people have told me this was the cupcake that changed their lives.  THIS was the cupcake that opened their eyes to a new wonderful world of possibilities.  THIS was the cupcake that made my husband fall utterly and madly in love with me (and of course for OBVIOUS other reasons like my killer high heel collection).   

I featured this recipe back in the day on the blog but back then I was more of a blogging newb.  Now with a couple years of experience under my belt I’ve improved the recipe with step-by-step pictures to go along to ensure that my readers get a flawless result every time.  Because I know I’ll be getting thank you letters and e-mails, attributing this Strawberry Cheesecake Recipe to the birth of peoples first child, or inducing sudden marriage proposals after consumption, or being the star of the party for bringing those “BOMB DIGGITY CUPCAKES”.  Don’t lie, you know you really wanna be that girl.  And guys, I won’t judge you if you made a batch of these to win over that cute girl you’ve been eyeing in your history class.  She’d be stupid not to date you after tasting these.

Ingredients for Strawberry Cheesecake Cupcakes – serving size 16-20 cupcakes

(Prep time: 45 minutes; Total cooking time: 2 hours)

  • 1 package graham cracker crumbs
  • 1 1/2 sticks of butter (12 Tbs), room temperature
  • 1 1/2 cup all-purpose flour
  • 1 tsp baking powder
  • 1/2 tsp salt
  • 12 Tbs unsalted butter, room temperature
  • 1 cup + 2 Tbs sugar
  • 1 tsp vanilla extract
  • 1/2 cup sour cream or plain yogurt
  • 4 large egg whites
  • 2 cups fresh strawberries, hulled & coarsely chopped


Preheat oven to 350 F and line 16-18 muffin tins with cupcake liners.  Mix one box of graham cracker crumbs with butter using a food processor.  The mixture should hold together when pressed with fingers, add more butter if needed.  Sprinkle about 1 tablespoon of the crushed graham cracker into the bottom of each prepared muffin tin.  Press down using fingers and bake for 3-5 minutes or until slightly browned.  Remove immediately from oven and set aside to cool.

In a medium bowl beat the egg whites until stiff, glossy peaks appear, about 3-4 minutes, be careful not to overbeat.  Set aside.

In a small bowl, mix together the flour, baking powder & salt. In a large bowl, cream together butter & sugar until light & fluffy and then add the vanilla & beat on a low-speed.  Then add half the flour mixture until incorporated then mix in the sour cream or yogurt.  Add remaining flour & mix until just blended.

Gently fold 1/3 of the egg into the batter until combined, do not over mix the egg whites or the cake will fall flat. Add remaining egg and fold in the chopped strawberries.  Fill each muffin tin about 3/4 of the way and bake for about 20 minutes depending on your oven.   You can test the doneness by sticking a toothpick through the center, if it comes out clean it is ready to take out!

Ingredients for Cream Cheese Frosting:

  • 2 packets of cream cheese (16 oz)
  • 2 sticks of unsalted butter (16 Tb)
  • 3 3/4 cups powdered sugar, sifted
  • 1 tsp vanilla extract

In a large mixing bowl, beat the cream cheese, butter and vanilla together until smooth.  Add the sugar slowly in small batches, beating on low speed until incorporated.  Once all sugar has been added, increase the speed to high and mix until light and fluffy.  Refrigerate for 1 hour.  When ready to serve, spread icing on cupcakes or use a pastry bag with a star tip.  Garnish with freshly cut strawberries and graham cracker crumbs and refrigerate until ready to serve.

Tagged , , , , , , , , ,

Copper River King Salmon

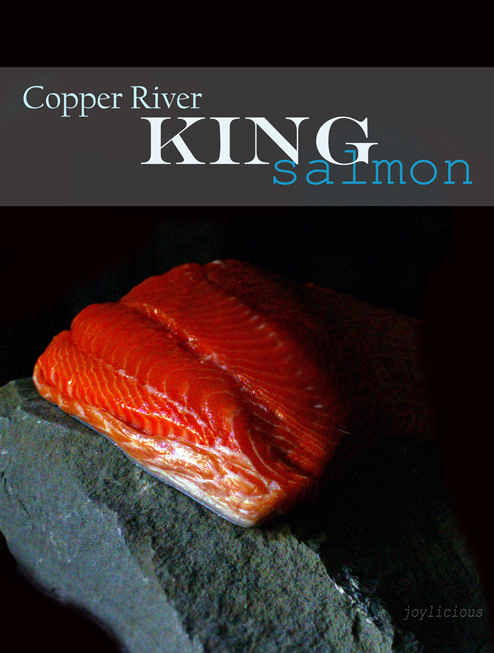
Out in Alaska runs Copper River whose name derives from the rich copper deposits found along its banks.  It’s fed by 12 tributaries, is a mile wide and runs at 7 miles per hour.  Besides being the 10th largest river in the US, it also is home to the best salmon in the world — flourishing in the “pure positive environment that creates salmon perfection.”


This Summer I’ll be representing Dallas as one of the Copper River Salmon Fresh Catch Crew Members where I’ll be pointing out places I spot CRS through my Facebook Page and Twitter and sharing all the wonderful recipes I’ll be making using Copper River Salmon.  My first shipment arrived last week: Copper River King Salmon — the king of quality, flavor and nutrition.  Prized for its exceptionally high oil content, succulent texture and rich flavor, this luxury fish literally melts in your mouth.


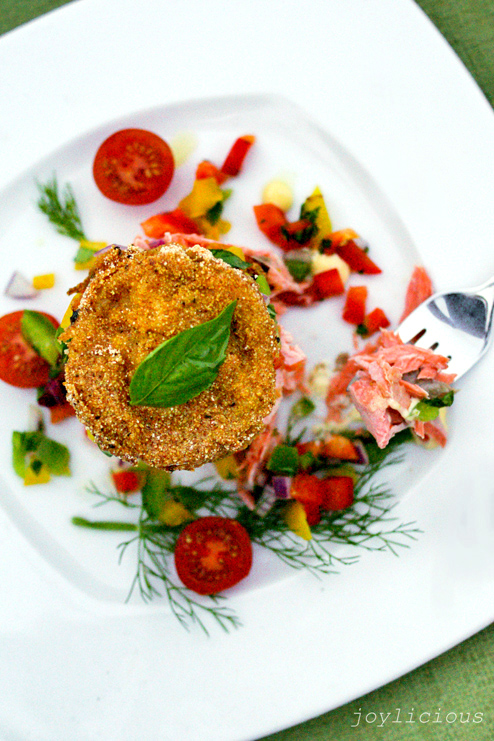
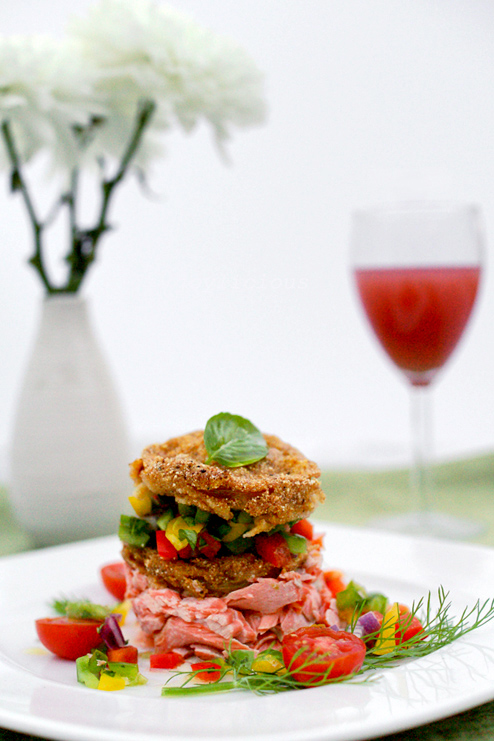
Can ya’ll imagine my excitement when he finally arrived ( I think it was a he…)?!!?! I wanted to come up with a recipe that allowed the salmon to shine like a star. With the hot Summer temperatures we’ve already been having in Texas, I kept in mind of what a good Summer dish entails: light and colorful, with just a hint of acid, and a plus if it’s healthy (cuz it’s swimsuit season y’all!). Can I have a drum roll please? I present to you: Grilled Copper River Salmon with a Herbed Tri-Pepper Salsa and Fried Green Tomatoes.


I love the versatility and simplicity of this dish.  It can be served warm or cold, it’s easy to make and plate (for family dinners or parties) and it’s freaking delicious AND healthy!!  I know. Life is good, it’s reeeeeaaaal good, like this recipe 🙂  Don’t forget to follow my Facebook Page and Twitter for updates on where I spot Copper River Salmon in the Dallas area!

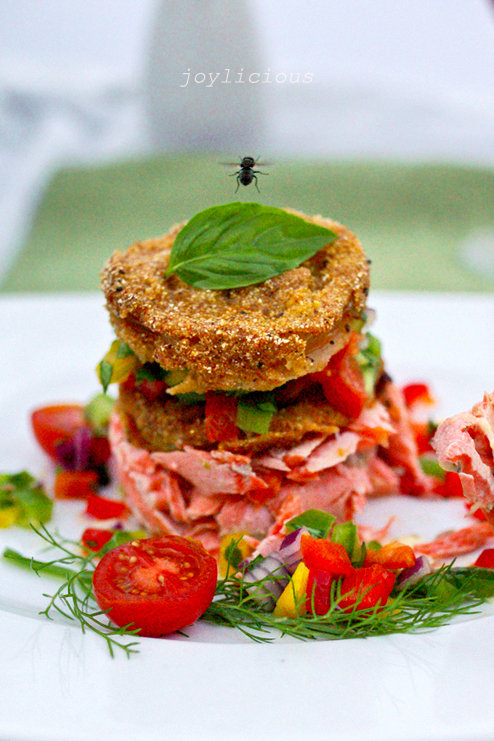
Despite the fly RUDELY inviting himself into my shot, I thought this turned out to be a pretty cool picture after all.  Can’t blame the fly for having good taste in salmon 🙂


Copper River King Salmon
Recipe Type: Appetizer
Author: Joy Zhang
Prep time: 20 mins
Cook time: 30 mins
Total time: 50 mins
Serves: 6-8
A perfectly grilled Copper River King Salmon fillet served with a Basil Tri-Pepper Salsa and Fried Green Tomatoes. The perfect appetizer for Summer!
Ingredients
  • 2 pounds Copper River King Salmon fillet
  • 1/2 cup olive oil
  • kosher salt and pepper to taste
  • 1/2 cup green bell peppers, chopped
  • 1/2 cup red bell peppers, chopped
  • 1/2 cup yellow bell peppers, chopped
  • handful of fennel, chopped
  • handful of fresh basil, chopped
  • 1/2 lime squeezed
  • 2 teaspoons honey
  • pinch of salt
  • 2 pounds green tomatoes, sliced
  • 2 cups flour
  • 3 eggs, beaten
  • 1/2 cup milk
  • 3 cups corn meal
  • 1 tablespoon Cajun spice mix
  • 2 teaspoon salt
  • 1 cup vegetable oil
Instructions
  1. Heat grill and follow salmon cooking instructions located below in “Notes”. I used a charcoal grill and cooked a 4″ thick 2 pound salmon fillet in about 20-25 minutes over medium heat (NEVER COOK FISH ON HIGH HEAT WHEN GRILLING)
  2. Meanwhile, prepare your tri-pepper salsa. In a large bowl mix the chopped peppers, basil, fennel, lime juice, honey and a pinch of salt together, adjust flavors to your liking. Refrigerate until ready to use.
  3. Next prepare your fried green tomatoes. Slice the tomatoes about 1″ to 1 1/2″ thick and dust in flour. (I keep scraps and butts as my “test batch” to make sure my oil temp and flavorings are right.) Beat the eggs and milk together until combined. In a large pan mix the cornmeal, Cajun mix and salt thoroughly together. Dip the dusted tomato slices in the egg and milk mixture and then coat generously in the cornmeal mixture. Set pieces aside in a large plate or pan.
  4. Line a large baking sheet with paper towels to drain the tomatoes when you fry them. Take a large cast iron skillet and heat vegetable oil over medium high heat, about 4-5 minutes. Using one of your test pieces, drop it into the hot oil and see how long it takes to cook. It should take about 3-4 minutes for a nice golden brown, adjust temperature of heat accordingly. Once oil is ready, line the pan with tomato slices, making sure they do not touch one another. Cook until golden brown on both sides. Remove from heat and drain on paper towels. When ready to serve, reheat in oven on a wire rack at 400F for 10 minutes.
  5. To serve: You can serve this appetizer in martini dishes or to plate them the way I do simply use a hollowed out can. Break up the salmon fillet into big chunky pieces and layer it on the bottom. Place a slice of fried green tomato on top of the salmon and then spoon the tri-pepper salsa next. Finish off with one more slice of fried green tomato and garnish with fresh basil and herbs. Serve immediately.
Notes

How long do I grill salmon? (from http://www.howtodothings.com/food-and-drink/a1889-how-to-grill-salmon.html)

How long you grill salmon (and most fish) is based on the temperature of the fire, the thickness of the fish at its thickest part, and the distance of the grill rack from the heat source. Never let salmon touch the flames on the grill.

Most fish cook quickly. A good rule of thumb is to grill fish for approximately 8-10 minutes per inch of thickness cooking it at 4-inches above the heat source. For grilling salmon, use the following as a guide:

* Salmon Filets: will cook in approximately 4-5 minutes. Do not turn over when grilling.
* Salmon Steaks: will cook in approximately 4-7 minutes. Turn once to cook on both sides. You can also sear the outside flesh on a hot grill and finish grilling on medium heat.
* Whole Salmon: Cook slow and low. Use the thickness rule stated above.

Again, these grilling times are approximate. Always keep a sharp eye on the salmon to keep it from overcooking. Fish does not hold its heat well so always serve the salmon immediately after grilling.

So, how exactly do I grill salmon?

1. Choose the type of salmon you want to grill (filet, steak or whole). Some recipes require specific types of salmon.
2. Lightly oil the grill rack or two-sided grilling basket by spraying or brushing on olive oil before placing salmon directly on the grill. (There is no need to do this step if you are grilling salmon in an aluminum foil pouch.)
3. Preheat the grill to a medium-high heat (300 and 325 degrees). Grilling salmon on a gas grill is ideal, but if you are using a charcoal grill, remember that the coals are generally ready when they are bright red and all actual flames have subsided.
4. Grill the salmon based on approximate grilling times noted above, making sure no flame touches the fish directly. The finished grilled salmon will flake gently when you part it with a fork and the flesh will feel firm when pressed. Like meat, salmon continues to cook a little bit after it is removed from the grill so it is better to remove it when it looks a tiny bit raw or deeper pink inside. Grilling salmon slowly and steadily over a medium heat will allow the fish to retain most of its own juices.
5. After you grill the salmon, serve it immediately.


Tagged , , , , , ,

Patrizio

Coming back from Europe has left me wanting more.  I miss that European flare I fell so much in love with while I was there — the art, the sophistication, the food.

This week I had the pleasure of interviewing Luciano Salvadore from Patrizio — an Italian bistro serving traditional Italian family fare.

Chef Luciano grew up in Vincenza, Italy and found his passion for cooking through his mother. By age 13 he started his first kitchen job and quickly developed his passion to become a chef.  He holds great pride in his heritage by using fresh, high-quality ingredients in his dishes — “There is nothing like good fresh tomatoes or fragrant olive oil, freshness is very important.”

Patrizio serves brunch on Saturdays and Sundays from 8am to 12pm and offers an array of exceptional Italian breakfasts like their famous Pizza Dolce Alla Nutella — a thin crust pizza topped generously with sweet chocolate hazelnut spread topped with pistachios.

Other great options include the Uova Strapazzate con Salsiccia, scrambled eggs served with Italian sausage and roasted potatoes and the Crespelle Farcite a Piacere, delicate vanilla crepes filled with your choice of spreads.

To read more on my article about Chef Luciano which includes a recipe for his AMAZING Uova Colombo, head on over to Crave DFW!

Banana Cream Pie Cupcakes

Baking has always been meditative to me — it takes patience, delicate finesse, and oh right, more patience.  Being Anal is key when making sure your measurements are spot on — not too much not too little. Timing is also another important one, a minute too long in the oven could be catastrophic.  But the best part of baking is the reward at the end: putting all the elements together to create the perfect masterpiece.  This recipe is exactly that.

These would be the perfect cupcakes to make that boyfriend who may need some extra convincing a proposal better be in order this year, or to butter up that stickler of a boss that seems to go out of his way to give you a hard time,  or better yet, for your family and loved ones for any occasion — because honestly, who doesn’t love a good cupcake.  (And I’m not talking about that Sprinkles bullshit.)   The point is, these cupcakes are amazing and contain magical powers that can induce sudden feelings of euphoria and grandeur.   Banana Cream Pie Cupcakes quite possibly may have become my new favorite cupcake after my Strawberry Cheesecake ones.

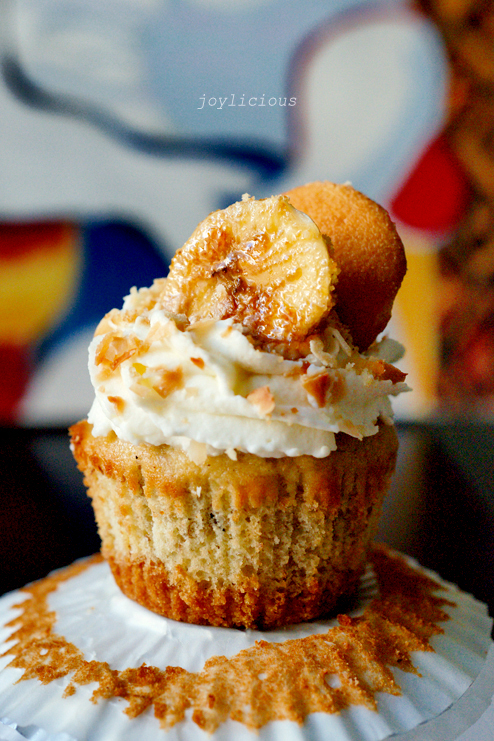
With a crunchy Nilla wafer bottom, layered with a moist Roasted Banana Cake that is filled with a vanilla bean banana custard, topped with Chantilly Cream and garnished with bruleed banana slices and more Nilla wafer love — I think it’s safe to say I’ve created my own personal masterpiece.  So without further ado, what better way to photograph my masterpiece than throwing one of my favorite artists in the mix?  Picasso meet Banana Cream Pie Cupcakes, Banana Cream Pie Cupcakes meet Picasso — you two make the quite the beautiful pair (and yes, I am positive Picasso would’ve loved these too.)

Banana Cream Pie Cupcakes
Recipe Type: Dessert
Prep time: 2 hours
Cook time: 1 hour
Total time: 3 hours
Serves: 16
A moist roasted banana cupcake with a Nilla wafer crust filled with a creamy vanilla bean banana custard. Topped with a chantilly cream and bruleed banana for garnish.
Ingredients
  • Nilla Wafer Crust
  • 4 cups Nilla Wafers, crushed finely
  • 1 stick (8 tablespoons) butter, melted
  • Roasted Banana Cake (adapted from Martha Stewart):
  • 3 ripe bananas
  • 2 cups cake flour (not self rising), sifted
  • 1/2 teaspoon baking soda
  • 1/2 teaspoon baking powder
  • 3/4 teaspoon salt
  • 1/2 cup (1 stick) unsalted butter, room temperature
  • 1/2 cup sugar
  • 3 large eggs, separated
  • 1/2 cup sour cream
  • Vanilla Bean Banana Pastry Cream (adapted from Jacques Pepin):
  • 2 cups whole milk
  • 6 egg yolks
  • 2/3 cups sugar
  • 1 vanilla bean
  • 1/2 cup flour
  • 2 teaspoons banana extract
  • Chantilly Cream
  • 2 cups heavy cream
  • 4 tablespoons sugar
  • 1 banana
  • 1/2 cup raw sugar (Turbinado)
  • 1/2 cup coconut shavings, toasted
Instructions
  1. Preheat oven to 400 F. Line standard muffin tins with paper liners. Place 3 whole peeled bananas on a baking sheet and roast 15 minutes. Remove bananas from oven and let cool, reduce oven temperature to 350F.
  2. Mix nilla crumbs with melted butter and blend together thoroughly, either using a food processor or your hands. The mixture should stick when you pinch the crumbs but still stay light a fluffy when broken apart. Place one tablespoon of cookie crumbs in each cupcake liner and press down, forming a compact crust. Bake for 4-6 minutes until the crust turns a slight golden brown.
  3. Meanwhile, sift together cake flour, baking soda, baking powder, and salt and set aside. With an electric mixer on medium-high speed, cream butter and sugar until pale and fluffy. Add egg yolks, one at a time, beating until each is incorporated, scraping down sides of bowl as needed. Add roasted bananas and beat to combine. Add flour mixture in three batches, alternating with two additions of sour cream, and beating until just combined after each. Beat in vanilla.
  4. In another mixing bowl, with electric mixer on medium speed, whisk egg whites to soft peaks; fold one-third whites into batter to lighten. Gently fold in remaining whites in two batches.
  5. Divide batter evenly among lined cups, filling each three-quarters full. Bake, rotating tins halfway through, until a cake tester inserted in centers comes out clean (I use a toothpick)_, about 17 minutes. Transfer tins to wire racks to cool completely. Cupcake can be stored up to 3 days at room temperature, or frozen up to 2 months, in airtight containers.
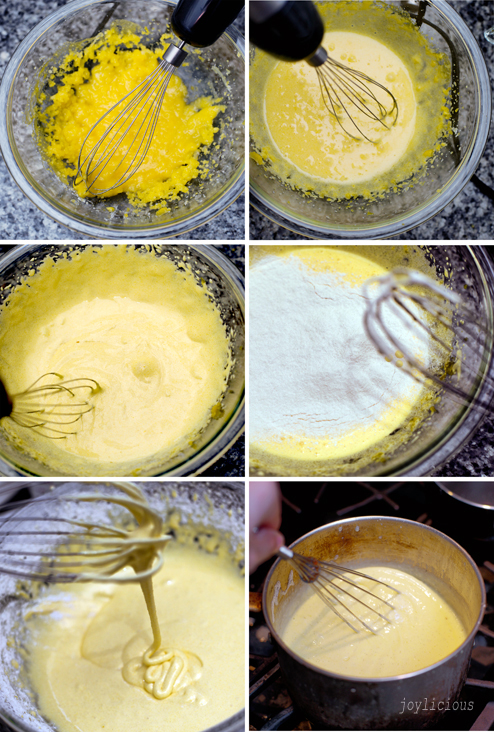
  6. Bring the ilk to a boil. Set aside. Place the yolks, sugar and scrape seeds from the vanilla bean (save the pod and set aside) in a bowl and work with a wire whisk until it forms a “ribbon”. This should take 3 to 4 minutes. Using a sifter, add the flour and mix well. Add half of the hot milk to the yolk mixture and mix well, throw the vanilla pod in the mixture. Pour the yolk mixture into the remaining milk, mixing as you go along. Bring to a boil on medium heat, stirring constantly with the whisk. The sauce will thicken as soon as it reaches the boiling point. Reduce heat and cook for 2 to 3 minutes, stirring constantly to avoid scorching. Remove from heat add pour through a strainer into a large bowl. Add banana extract and allow to cool to room temperature.
  7. In a large bowl place 2 cups of heavy cream and using a whisk or hand blender, whip until it forms soft peaks. Add the sugar gradually as the cream begins to stiffen. Refrigerate for 30 minutes or until ready to use.
  8. To finish, using a small spoon or 1″ circle cooking cutter, core out the centers of the cupcakes for the custard filling and set the tops aside. Fill each cupcake to the top with custard and place the tops back on. The top will be a little higher than the rest of the cupcake but that will help hold the height when you add the whipped cream.
  9. Place chantilly cream into a pastry bag fitted with a medium French-star tip. Generously pipe whipped cream on top of cupcakes, making sure you cover the tops completely.
  10. Peel banana and slice into 1 inch rounds. Coat with raw sugar and using a hand-held torcher, lightly burn the sugar on each side. Garnish with bruleed bananas and toasted coconut shavings, finishing it off with a nilla wafer.
  11. This can be enjoyed either at room temperature or frozen as an ice cream cake!
Notes

When making the pastry cream, be extra cautious when you bring the mixture back to the heat. While the custard thickens you need to make sure the mixture is constantly moving to avoid clumps and cooking of the eggs. If the mixture seems to be heating too quickly, reduce the heat. The consistency should be nice and thick, similar to a pudding texture.


Tagged , , , , , , ,

Cooking Matters Conclusion

If you’ve been following my Cooking Matters series where we introduced the program, explored the problem of child hunger in America and the exciting donation of $1,000 in our names at our local Food Banks from the ConAgra Foods Foundation, then you pretty much rock and thank you for joining me the entire way.  It’s been an incredibly humbling and eye-opening experience all around.

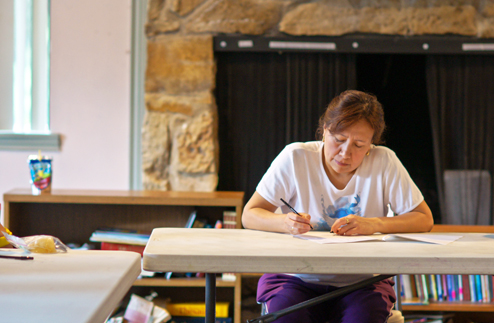
After the Cooking Matters bootcamp ended, the bloggers were asked to participate in a Cooking Matters Program in our community.  I had the pleasure of working with the North Texas Food B ank here in Dallas.  I was assigned to volunteer at the Heart House which is an organization that offers child-care assistance to low-income Hispanic families.  Sarah Bensinger was the nutritionist for the class and Jonas Luster served as our volunteer professional Chef.

On the first day of the program, a heavy tone of apprehension seemed to hang in the air about what the program would teach them or the journey they were about to embark on.  But week after week they were introduced to new information and tasks that helped solidify the important ways on how to feed their families.  Through a series of cooking demonstrations, visual methods on showing the negative effects of fast food, a grocery shopping lesson — these families were able to learn ways of using cost-effective methods while providing healthy meals for their families that were filled with fresh fruits and vegetables, whole grains and leans meats.

By the last week, you could feel the difference in attitudes amongst the students: they became more engaged, they were laughing and actively participating, they felt excited about using and sharing all the new knowledge they’ve learned with their friends and family.  As each mother took her final exam and received her certificate of completion of the program, you could tell there was a sense of renewal within all of them.  And none of this would’ve been possible without the help of volunteers.

(Chef Jonas Luster, who volunteers his time at NTFB also author of FeastCraft)

It’s important for all of us to give time back to the community, When my family first moved to America, we were welcomed with open arms from complete strangers who volunteered their time and love to teach and offer us the things we didn’t know and have.  Without their help and generosity, our family wouldn’t have made it as far as we have today — and for that I am forever grateful.  That’s what makes the World go round — helping others, especially for those who are less fortunate than you.  Take action and volunteer your time and love to someone today.  For those that are interested in volunteering at North Texas Food Bank you can find more information here.  Also find programs around your area through Share Our Strength or Cooking Matters.

Thank you so much to ConAgra Foods, Share Our Strength, and North Texas Food Bank for the amazing Cooking Matters experience.  Together we can end child hunger, one family at a time!

.


Tagged , , ,